Landfill
With the track tested, it was time to turn my attention to filling in the huge gaps either side of the track. With a garage full of scrap polystyrene saved for that very purpose, I set to work with my sharp knife. Some people prefer saws and some hot wire cutters but I don't think you can beat a really sharp large kitchen knife. However first things first. This layout is certainly not flat! I had previously drawn a topographical plan of the entire layout and, as I had done this on autocad, I was able to produce cross sections at 50mm intervals which I then printed and used as templates for cutting the polystyrene. I have to admit that I was a bit more slapdash with the hillside at the back (which I did first) and had to go back and make some ajustments!
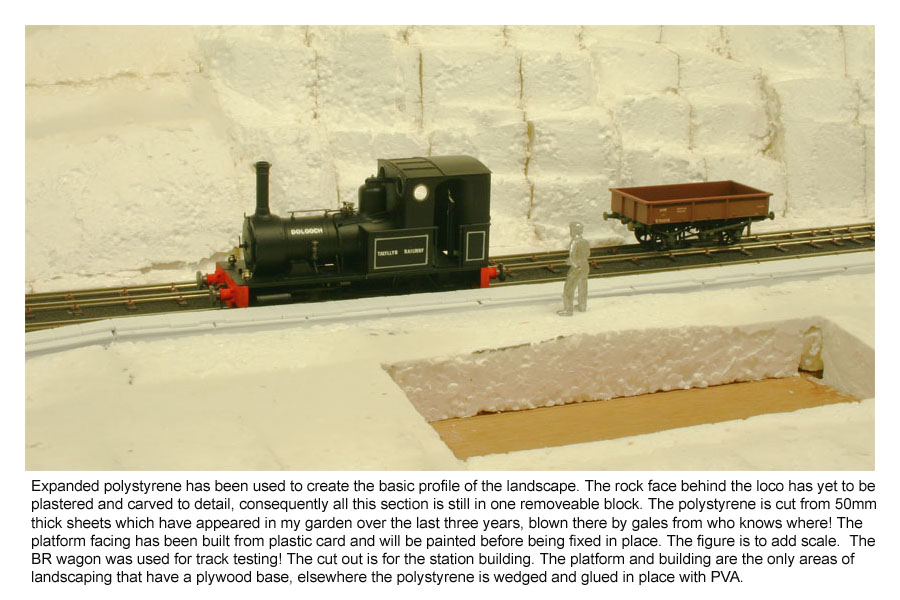
Remember to leave the polystyrene at least 2 or 3mm low to allow for a finishing coat. Plywood boxes that roughly follow the line of the hillside were made to cover the turnout switching units. The plastering and carving of the rock face will be a major project in its own right, not to mention a very messy one. Watch this space. The first job to be done after the landfill was putting in the disused siding. As this is non operational and falls away in two planes (presumably due to subsidence), it was decided to lay the underlay on the landform and not on a baseboard. The platform facing came next, the structure built in situ to ensure it followed the curve of the track, using plastic card, but not fixed to the baseboard just yet. The stone facing was scribed on 20 thou plastic card, then laminated to the structure. Individual edging stones were cut to size from 60 thou plastic card and glued to the top of the structure, taking care not to line them up too neatly! A concerted and messy attack with files and sandpaper made sure that years of wear were achieved in a couple of hours!
to be continued.........well it's over 4 years later and I have finally got around to doing an update!
Other projects seem to have taken up more of my time in those four years but I did have a mini blitz on the layout a couple of years ago.
Landscaping
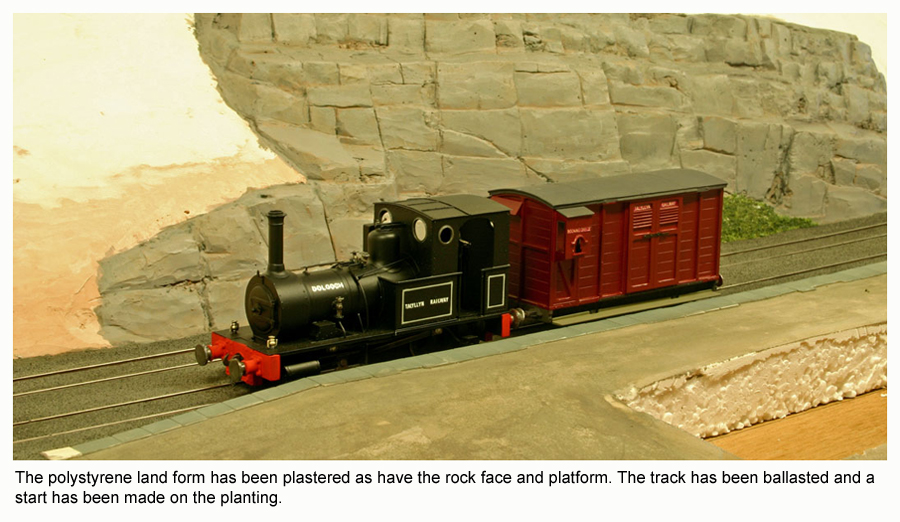
The removeable block forming the rock face and adjacent areas was plastered with a mix of gypsum plaster and PVA. Once this was set hard it was carved to give a representation of a rock face that had been blasted out of the hillside, using photographs as a guide. Once this was completed the block was glued in place with PVA and the rest of the landform was covered with lightweight filler, as was the surface of the platform. The same material was used to make up the level on the track bed, taking care to form a gap against the inside face of the rails which were were then painted prior to ballasting. Ballasting comprised a mix of charcoal dust and ash from the fire sieved to remove any lumps and sprinled onto a generous layer of PVA. The PVA needs to be applied very accurately to ensure keeping the flangeways clear. The rock face was painted with artists' acrylics after which it was finished off with weathering powders. The platform and access track also received a coat of paint.
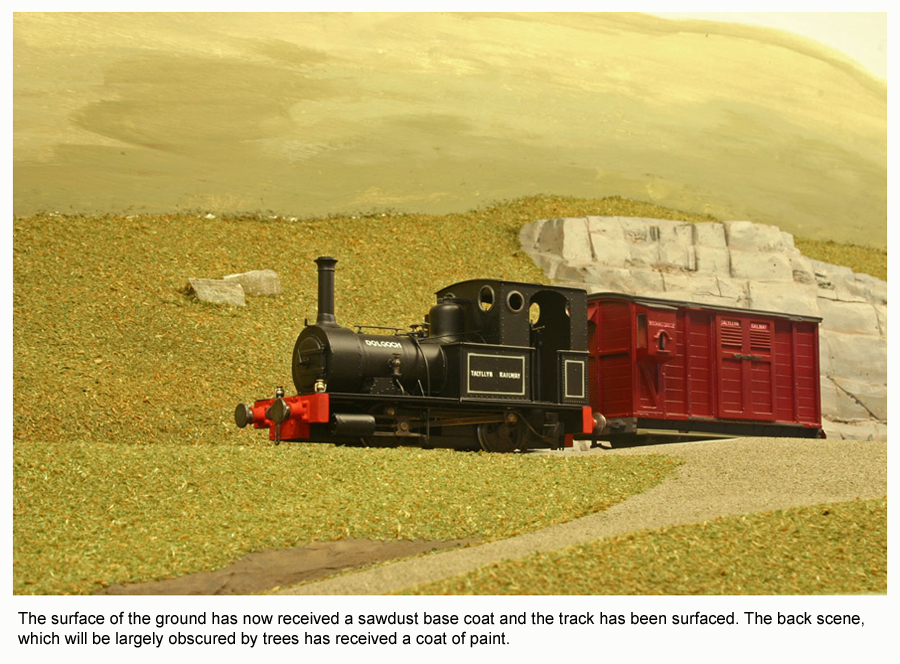
I bag up suitable sawdust from my worshop and set it aside for modelling. It is seived then coloured with fabric dye (Dylon Olive Green) and dried out in the range while SWMBA is out of the house! If you forget to take it out, the smell is disgusting and the result useless! The sawdust is sprinkled into a generous layer of PVA and this gets rid of the glaring white filler and provides a good base for the final planting. The track up to the station has been covered with crushed stone. Living on the coast, it is not difficult to find a couple of pebbles of a suitable colour which can then be attacked with a lump hammer. Eye protection should ne worn! The ensuing mess is then sieved and, again, sprinkled in PVA.
The back board is painted with artists' acrylics mixed in with white emulsion paint. The colours are kept fairly subdued.